Communicating between components in Java Using Guava Event Bus
One common situation that arises when building enterprise application is implementing a chain of business processes after one process is successful, for example, if you are building a shopping website, you might want to do the following after payment for a product is successful
- Reduce the number of items available in the store after the purchase.
- Send the shop owner a receipt for the purchase.
- Send the buyer a receipt for the purchase. In some cases, you might want these processes to be atomic with respect to the product purchase, that is,** after product purchase occurs the number of items must decrease, revert the product purchase if there is a problem decreasing the number of available items**. You generally would want to do this in a transaction to make the process atomic.
In some other cases, the second process might not be important enough to revert the execution of the first phase if it fails, for example, you might not want the process of sending receipts to the customer or seller to affect the process of payment. In such cases, you would want to decouple the components handling both processes as much as possible so that they can execute their operations independently, this is where an Event Bus would help us.
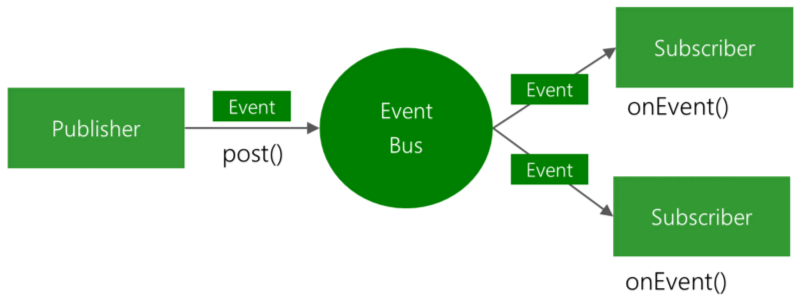
What Is An Event Bus?
An Eventbus is a mechanism that allows different components to communicate with each other without knowing about each other. A component can send an Event to the Eventbus without knowing who will pick it up or how many others will pick it up. Components can also listen to Events on an Eventbus, without knowing who sent the Events. That way, components can communicate without depending on each other. Also, it is very easy to substitute a component. As long as the new component understands the Events that are being sent and received, the other components will never know. http://www.rribbit.org/eventbus.htmlIn this tutorial, we would use the Google Guava Event Bus implementation to show how we can decouple components in our java applications
Note: The docs to the library has this to say about the Event Bus
EventBus allows publish-subscribe-style communication between components without requiring the components to explicitly register with one another (and thus be aware of each other). It is designed exclusively to replace traditional Java in-process event distribution using explicit registration. It is not a general-purpose publish-subscribe system, nor is it intended for interprocess communication. In our example, we would demonstrate how to use an event bus by simulating the payment process mentioned at the beginning of this article.
So, here is the components involved in our application
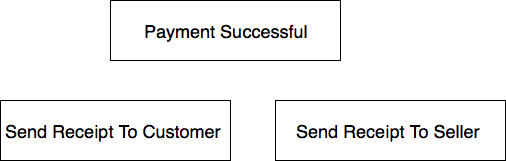
The first component should handle processes that is involved directly with a successful payment, like reducing the number of items left in the store.
- The second component handles sending receipt to the customer.
- The third component handles sending, receipt to the Seller. We could chain these processes together by implementing them in different methods and call them sequentially
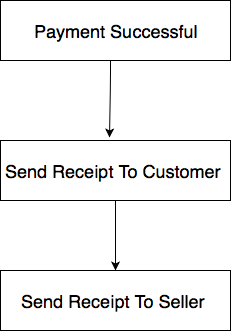
we could have it implemented like this
But the problem with this method is that the components are not properly decoupled and a when an error occurs in one process, it could affect the other process. Also, if we have to add more processes to be executed after a successful payment, we would have to manually go to the onPaymentRecievedMethod() and add the method call, this is not good and we would address this issue using an Event Bus, the Google Guava Event Bus.
This is how our implementation would looks like
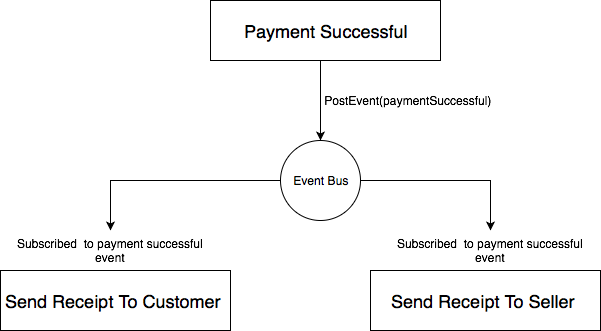
The payment component and the receipt sender components are completely unaware of each other, the event bus is responsible for carrying the information from the publishers to all the subscribers.
How Does Guava Event Bus work?
Lets have some quick tips.
- Some important concepts in the Guava Event Bus are i. The Event Bus: This is the object that is delegated the responsibility of carrying the event data from one component to another, you generally would want to have one instance of the event bus so that the producer and the subscriber would use the same event bus, this is required for the event bus to work correctly. You could use the singleton pattern to ensure that only one instance of this class is created and use an IOC container to provide that instance whenever an instance of the event bus is required.
Note: You could have multiple instances of the Event but if you want different event bus to handle different set of components, but just know that a publisher and a subscriber must use the same event bus if they must communicate with each other.
ii. The Producer: The producer is responsible for emitting the events, these events are then passed on to the event bus and are sent to all listeners that are subscribed to that event.
iii. The Listener: The listener, subscribes to an event and it is triggered when that event is posted from the producer, you could have a listener method run Synchronously or Asynchronously depending on the kind of event bus you use. To make the listener method run synchronously, you would use a synchronous Event Bus which is the default EventBus class, to have it run asynchronously you would have to use the AsyncEventBus class which is a subclass of **EventBus **and its constructor requires an Executor that would be used to execute the method on a separate thread. In our example, we would use an Asynchronous EventBus.
iv. The Event: In Guava event bus, the Event is just a object that is uniquely identified using the name of the class. So to create a payment successful event, we just need to create a class PaymentSuccessfulEvent.java and have an instance of that class posted when a payment is successful.
How to use the Event Bus Library
1. Add the Google Guava Library to your project
You could do this using your favourite dependency management tool, lets use maven:
<dependency>
 <groupId>com.google.guava</groupId>
 <artifactId>guava</artifactId>
 <version>26.0-jre</version>
</dependency>
2. Create factory methods to provide our event bus instance.
We would just use a static class member to hold the instance of the event bus and forget about the complexity of adding an IOC container to this demo.
the EventBusFactory class has a method getEventBus() which returns a single instance of an Async event bus.
3. Create the Payment Successful Event.
Like we said earlier, the event is just a simple class and each event is identified by the name of the class. So lets create a PaymentSuccessful event.
so this event would be posted when a payment is successful.
4. Create Listeners for the Payment Successful Event.
In Guava Event Bus, a listener a method that is decorated with the @Subscribe annotation and it is triggered whenever the Event in its argument is posted. Lets create a Payment Successful event listener
5. Register the event listerners.
At the point where the application is started, we have to register the Receipt sender class as an event listener, telling guava event bus that it contains methods decorated with @Subscribe annotation. This is done by passing an instance of the RecieptSender class to the eventBus.register() method.
java EventBusFactory.*getEventBus*().register(new RecieptSender());
6. Post the event.
We would now post the event whenever a payment is successful.
This would trigger all methods that have the Payment event as their argument and also has the @Subscribe annotation.
Feels free to share you thoughts in the comments, I want to hear your experience implementing this pattern.